
Neighbor Runoff - Instructions (High Capacity)
Step 3 of 3: Runoff from Neighbor's Property (High): Installation Instructions
Download as PDFPrior to installation, have your local utility companies locate and mark the location of existing utilities.
Layout your drainage system and mark the location of trenches and individual parts to be installed with marking paint before digging. Carefully remove grass or plants that are located where the trench will be dug so they can be replanted after installation. Trenches should be dug such that they slope a minimum of 1% away from your house. Place all excavated dirt on a tarp so that it can be used later to backfill.
To speed up installation, a trenching machine can be used to dig all trenches, especially in areas with particularly hard soil. NDS drainage products have been designed to be installed in any soil type. Due to the variety of pipe types and sizes, double check that all pipe connection points are the correct size. Please follow all installation directions included with the individual parts of your drainage system. To create watertight connections between products, apply a bead of waterproof silicone or glue to both parts and connect.
This system requires that the elevation of the Pop-Up Emitter be lower than the elevation of where stormwater enters the drainage system or the system will not drain.
-
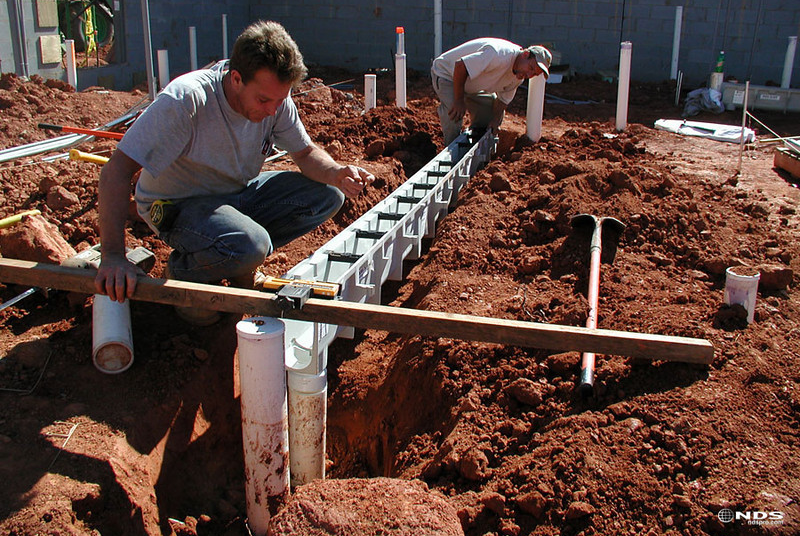
- Dig trench for EZ-Drain and Flo-Well along the property line where the runoff is draining onto your property.
- Flo-Well(s) should be installed under the areas where the runoff is collecting.
- Dry fit (no glue) the entire drainage system from the EZ-Drain to the Pop-Up Emitter.
- The Flo-Well should be installed at least 10’ away from any existing structure.
- Measure and cut all pipe to necessary lengths.
- After completing each step, glue parts together if a water tight connection is required.

-
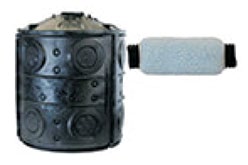
- Knock out the appropriate holes in the side panels of the Flo-Well where the EZ-Drain will be installed.
- Assemble the Flo-Well using the interlocking side panels.
- Slide the drain pipe through the hole in the Flo-Well side panels.
TIP: Lay the Flo-Well panels on bricks or other hard surfaces and use a hammer to knock out the holes in the side panels.
-
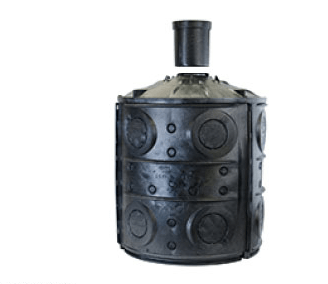
- Knock out the center hole of the Flo-Well lid.
- Place the lid on the Flo-Well side panels then place the Flo-Well Surface Inlet onto the Flo-Well lid.
-
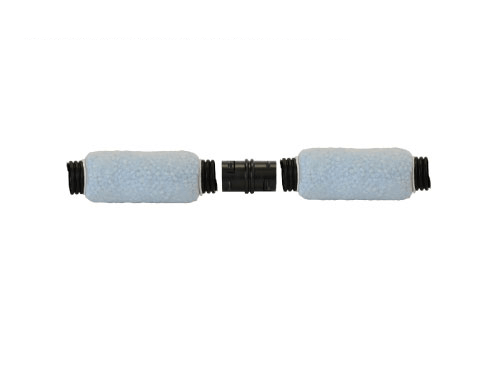
- Connect sections of EZ-Drain with internal corrugated-couplers.
- Lay EZ-Drain pipe in the trench.
-
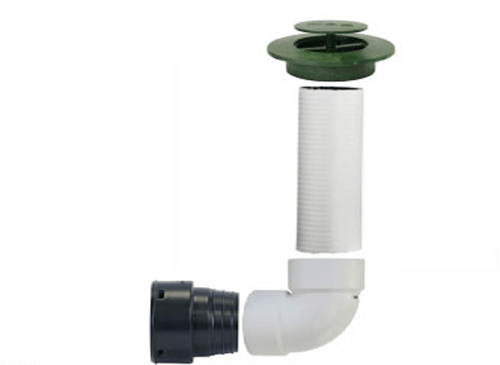
- Using a Corrugated Pipe Adapter, connect the EZ-Drain to an elbow with a weep hole. The elbow should be installed with the weep hole on the horizontal side of the elbow.
- Slide the Pop-up Emitter onto the elbow. An additional length of pipe can be used to bring Pop-up emitter to the surface.
- The Pop-Up Emitter fits on the “bell” or “hub” end of the pipe or a pipe coupler.
TIP: To avoid damaging your Pop-Up Emitter with your lawn mower, raise the cutting level of the blades or avoid passing the mower over the Pop-Up Emitter.
-
- Backfill and replace any grass or plants that were removed.
TIP: DO NOT BACKFILL WITH SOIL WITH HIGH CLAY CONTENT.
Water must be able to easily pass through the backfilled soil.

- Backfill and replace any grass or plants that were removed.
Have Questions? Need Help? Want to Know More?

Have Questions? Need Help? Want to Know More?
No questions are too big or small. Find out how NDS solutions experts can help you solve your water management problems. Call 800-726-1994 or contact us by clicking below.
Contact Us