Nyloplast PVC Repair Coupler Installation Standard Details
Filename:
Nyloplast PVC Repair Coupler Installation Standard Details.pdf
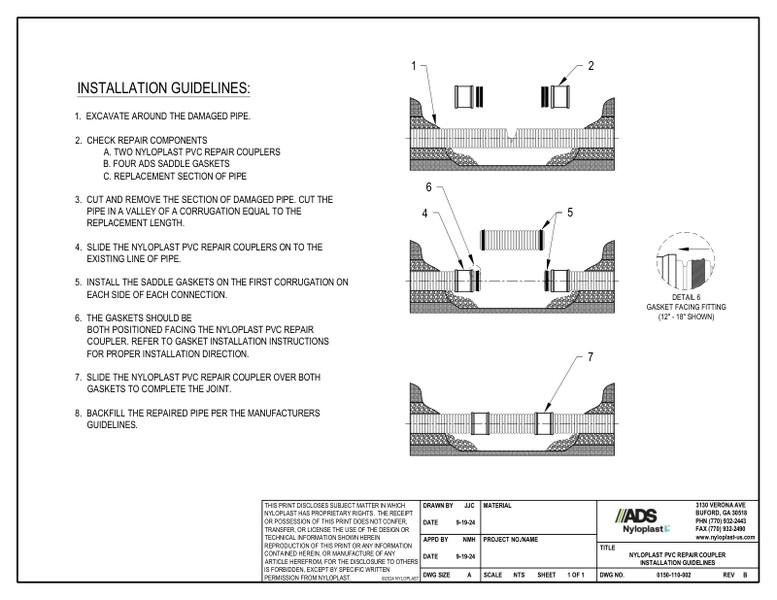
This document is the Nyloplast PVC Repair Coupler Installation Standard Details. 8 steps are listed for installation with a component diagrams.
The first step is the excavate around the damaged pipe. Step 2, check the repair components – couplers, saddle gaskets and replacement section of pipe. Step 3, remove damaged pipe and cut the pipe in a valley of a corrugation equal to the length. Step 4, slide Nyloplast repair couplers onto existing pipe. Step 5, install saddle gaskets on the first corrugation. Step 6, gaskets should be positioned facing the Nyloplast PVC repair coupler. Step 7, slide the Nyloplast PVC repair coupler over both gaskets. Step 8, backfill the repaired pipe area.
Diagrams are shown for each step in the process.