STD-1100A Inserta Tee® Fittings Installation Instructions Detail
Filename:
STD-1100A Inserta Tee® Fittings Installation Instructions Detail.dwg
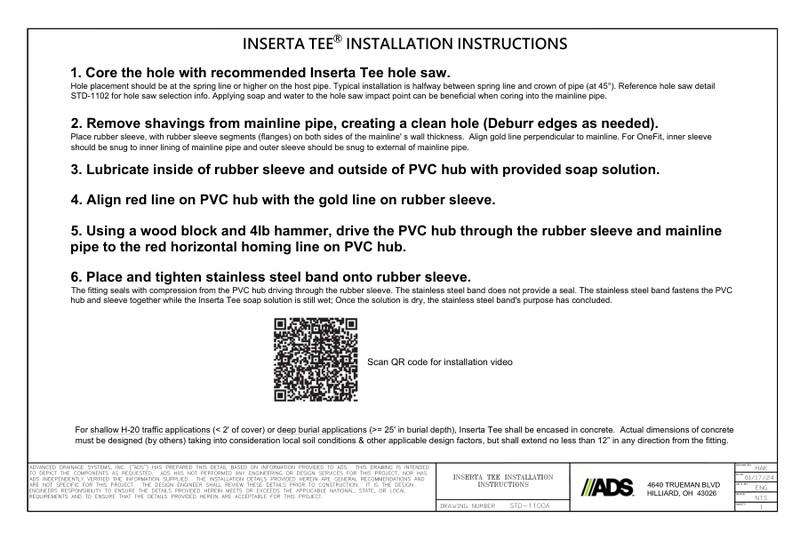
This document explains the Inserta Tee Installation Instructions Detail. A 6 step list of installation instructions with QR code for video included.
1. Core the hole with recommended Inserta Tee hole saw. Hole placement should be at the spring line or higher on the host pipe. Typical installation is halfway between spring line and crown of pipe (at 45°). Reference hole saw detail STD-1102 for hole saw selection info. Applying soap and water to the hole saw impact point can be beneficial when coring into the mainline pipe.
2. Remove shavings from mainline pipe, creating a clean hole (Deburr edges as needed). Place rubber sleeve, with rubber sleeve segments (flanges) on both sides of the mainline' s wall thickness. Align gold line perpendicular to mainline. For OneFit, inner sleeve should be snug to inner lining of mainline pipe and outer sleeve should be snug to external of mainline pipe.
3. Lubricate inside of rubber sleeve and outside of PVC hub with provided soap solution.
4. Align red line on PVC hub with the gold line on rubber sleeve.
5. Using a wood block and 4lb hammer, drive the PVC hub through the rubber sleeve and mainline pipe to the red horizontal homing line on PVC hub.
6. Place and tighten stainless steel band onto rubber sleeve.The fitting seals with compression from the PVC hub driving through the rubber sleeve. The stainless steel band does not provide a seal. The stainless steel band fastens the PVC hub and sleeve together while the Inserta Tee soap solution is still wet; Once the solution is dry, the stainless steel band's purpose has concluded.