30" Split Coupler Installation Guide
Filename:
30" Split Coupler Installation Guide.pdf
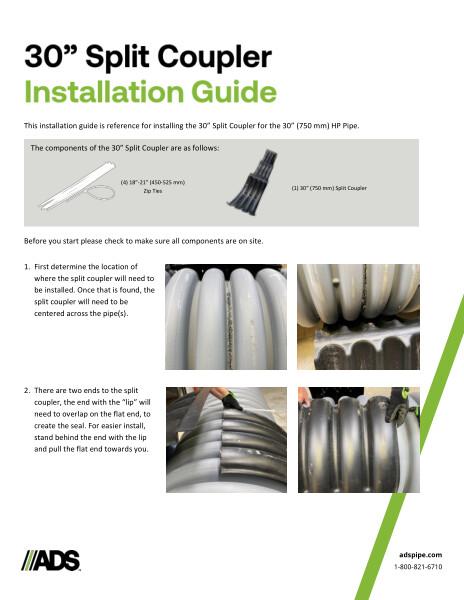
This document is the 30" Split Coupler Storm Installation Guide. 5 steps are listed for installation with a component diagram and photographs.
The components of the coupler are shown with zip ties and a 30” split coupler.
Before you start installation, make sure all components are on site. To install, assess where the split coupler will need to be centered on the pipe. There are two ends to the split coupler, the end with the “lip” will need to overlap on the flat end, to create the seal. For easier install, stand behind the end with the lip and pull the flat end towards you. Pull the lip over the flat end tightly so that the three holes for the zip ties are accessible and are lined up with the holes in the lip of the split coupler. Once the split coupler is aligned, thread the zip tie through the middle hole of the lip and then through the middle hole of the body of the coupler. Pull tight and thread the end of the zip tie through the square notch. Tighten the tie until you have a tight fit. Continue this process until all 3 zip ties have been installed. After 3 zip ties have been tightened and trimmed, the split couple is installed.
Photographs for each step are included.